
Face the Facial Cupping Facts
Our face holds so much information for the people we meet each day.
Tiny expressions reveal our moods and thoughts.
We tend to think of it cosmetically. Something to upkeep and smooth out.
While that’s important for us emotionally and, to an extent, healthy for our self-worth, sometimes we can forget that right under the surface there’s a lot going on under our skin.
From follicles, to capillaries, to our sinuses, there’s a whole highway under the surface that can sometimes get a little backed up.
No one likes a traffic jam.
What can help keep our skin glowing and healthy?
It’s time to consider facial cupping!

First things first: What is it?
You remember Cupping Therapy right? We had a whole blog about it!
Maybe you've even been into the office for a Cupping session of your own.
Is it the same? Not exactly, but there are a lot of similarities.
Quick review: Massage Therapy utilizes downward pressure, compression, to loosen connective tissue and muscles. Cupping is basically the reverse, decompression, suctioning the tissue upward, applying negative pressure.
In facial cupping this has a lot of benefits including:
Increased blood circulation
Stimulating collagen production
Firm and tone skin
Reduce acne scarring and hyperpigmentation
Relieve sinus congestion
Relieve facial tension
Meditative application process

The biggest difference is going to be in the application.
Cupping’s trademark are those red circles you see on athletes, but that’s not what we’re looking for here. Usually to achieve that level of decompression, the cups are left in a specific area. However, because of the face’s delicate nature, that much pressure can have a negative effect.
So how do you use your facial cups safely and effectively?
Facial Cupping: How to
As it was mentioned, if you leave the cup in one spot too long, you’re heading for some marks. It should be noted, Cupping marks on your body aren’t inherently bad, it’s a reflection of stagnation in a particular area, not just bruising. However, the goal here is for a healthier look and so the best thing to do is to keep your cups moving.
The Steps:
1. Wash your face with a gentle cleanser.
2. Apply your serum or oil of choice
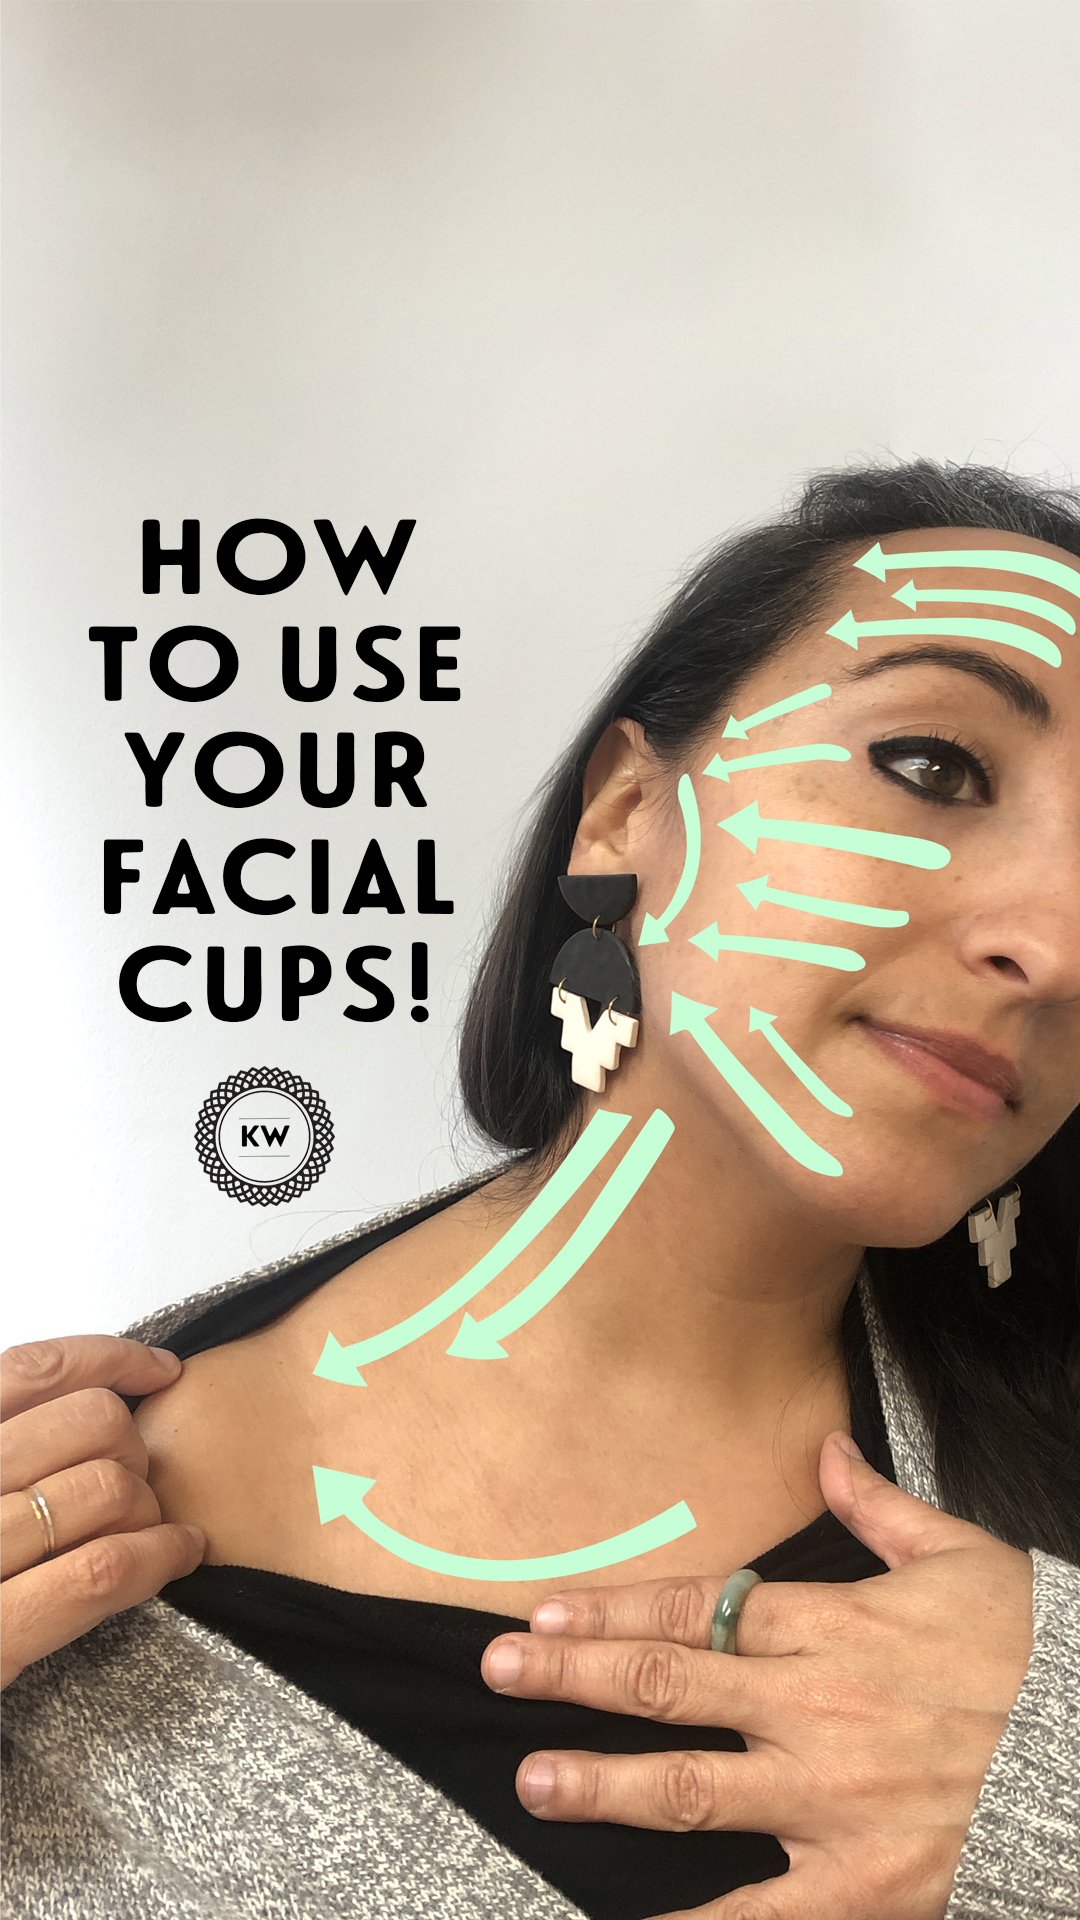
3. Using gliding strokes along the collarbone, jawline, cheeks and forehead.
Also remember: Facial Cupping mimics the pumping action of the lymphatic system, so you’re going to be using movements that direct the lymphatic flow downward toward your heart. Start at your collarbone first then work your way to the crown of the head. Use this diagram as a guide.
4. Use the smaller cup for smaller areas along the sinuses and eyes
Continue the process for 5-15 minutes, working on each side at a time.
The effects are cumulative so you will see more results if you’re consistent with your regiment. Start slowly with one session a week. One expert suggests keeping 3 days in between sessions.
The oils:
Don’t feel like you have to go out and get something fancy, you may have just the right oil in your cupboard or at the grocery store. If coconut oil works well with your skin, that can be a great place to start. Some people who are more acne prone may want to start with hemp oil, jojoba oil or shea butter.
If you do want to indulge a little further consider getting an oil or serum from one of these small businesses:
Here are some of our favorites!
-Favorite State - All Purpose Oil

Show your Skin Some Love!
Fall is the perfect time to rehab your skin from the sun and salt of the Summer.
Make facial cupping a part of your new wellness routine and see the results into the new year

Want a set of your own? You can pick them up at your next appointment or right in our online shop!